MyCupKates

Showing posts with label Recipes. Show all posts

Monday, 19 September 2011

[Recipes] Ricotta Cheese Cake


 Ricotta Cheese cake 

I love cheese cakes.. I've made New York Cheese cakes & blueberry cheese cakes but
never tried Ricotta cheese cake before.
I've been eager to make it since I visited Pasticceria Papas in Haberfield, NSW.
They sell cookies, cakes, ice cream, coffee, bread..etc.
I bought a small ricotta cheese cake for our big family dinner and tried a slice...it was AMAZING!
The sweetness of the cake is not overpowering so you can fully enjoy delicate cheese taste.
I loved it so much!


I found the ricotta cheese cake recipe(by joy of baking) I wanted to try so
 I bought all the ingredients to give a good go.

It is quite expensive to make if you are going for a good quality of cheese( ricotta & cream cheese).
I was hoping my cake turned out great because I didn't want to fail especially with pricey ingredients.


As you can see, it turned out great. Soft & creamy..and Heavenly!
When you have guests for dinner and should prepare some good dessert. This is it.
I recommend that you make it a day ahead so flavours are mature enough and well blended.

I have guests for dinner tonight so I made it yesterday. 
 I don't have to worry about making dessert today! Pressure free=D Yeh!


Feel free to take a bite.
It is Heavenly! 

Have a delicious day!!
Thank you for visiting, everyone.

Recipe info here ->http://www.joyofbaking.com/RicottaCheesecake.html


Monday, 12 September 2011

[Recipe] Apple Crumble


Hi, everyone!
I love fresh apples.
I usually buy a box of apples and store them in the fridge.
I eat them for breakfast and sometimes bake apple muffins, pie or apple crumble..etc.

When apples are too ripe or not fresh, I use them for baking.
One of my favourites is the apple crumble.
It is super easy to make and super fast!


 Normally, many recipes for apple crumble require canned apples but I made it myself.

How to make your own stewed apples
800g apples ( about small 7~8 apples), chopped
1/4 cup~1/2 cup brown sugar (adjustable)
Fresh lemon juice 3 table spoons
 Just under 1/4 cup water
Cinnamon(optional)

Mix all together in a saucepan and stew in medium heat.
Stir to cook even until achieving a texture you want. ( I like it crunchy.)


Apple crumble
(Serve 6~8)

1 cup plain flour
1/2 cup rolled oat
1/2 cup firmly packed brown sugar
100g butter, chilled, chopped
1 teaspoon cinnamon

1/2 cup chopped walnut 
800 g stewed apples( recipe above)

1.Preheat oven 180'C.
2.Mix first 5 ingredients in a bowl and rub in until making bread crumbs consistency.
3.Add walnut above and mix well.
4. Place apples on an oven proof dish and scatter crumble mixture evenly over apples.
5. Bake for 20~25 minutes.
Done!

You can serve it with a scoop of vanilla ice cream.
(I love melting ice cream on warm apple crumble..Delicious!)
You can also add some berries if you have frozen berries sleeping in your freezer.^^

Have a great day!!
Thank you for visiting.


Happy baking!


Friday, 9 September 2011

[Recipes] Flower Sugar Cookies


Hello, everyone.
I've always tried to make cookies with cute decoration 
since when I found out  bloggers posting about amazing cookie decoration. 
It has been a few months since then. 

I finally made sugar cookies and royal icing for decoration.
I was so excited about using royal icing!!
I used meringue powder for royal icing. It is so easy & simple to make.
You can always control the thickness of royal icing by adding water.


Sugar cookies is also simple to make.
There are lots of recipes for cookies.

I have this Christmas cookies recipe from 'Taste.com.au'
(about 24 cookies)

Ingredients
  • 125g butter, at room temperature
  • 1/2 cup (115g) caster sugar
  • 1/4 cup (60ml) milk
  • 1 tsp vanilla extract
  • 1 1/2 cups (225g) self-raising flour
  • 1/2 cup (70g) custard powder
  • Silver and gold sparkling cachous, to decorate


  1. Preheat oven to 180°C. Line two baking trays with non-stick baking paper.
  2. Use an electric beater to beat the butter and sugar until pale and creamy. 
  3. Beat in milk and vanilla extract. Fold in the flour and custard powder.
  4. Press the dough into a ball and wrap in plastic wrap. 
  5. Refrigerate for 30 minutes to rest.
  6. Divide the dough into manageable portions. 
  7. Roll out one portion on a sheet of non-stick baking paper to about 1cm thick. 
  8. Use Christmas cookie cutters to cut shapes and place on the trays. Decorate with cachous.
  9. Bake for 10 minutes or until light golden. 
  10. Cool for 5 minutes on the trays before transferring to a wire rack to cool completely. 
  11. Repeat with remaining dough.

If you have cute cookies cutters, you can simply use them &
decorate with anything you like.
You can make any cookies you like ginger cookies or chocolate cookies..etc.


I decorated with baby blue royal icing for the round bottom and added a sugar flower on the top.
You can also decorate with sprinkles or draw simple design with a piping bag.
I didn't use any piping bag for the blue round shape.
I used a spatula by adding a big drop of royal icing in the middle of the cookie and tapped it lightly 
until I got the round clean shape and let it dry til firm.

Here is a royal icing recipe by Wilton.
If you make small batch of cookies like me, you can also halve the royal icing recipe.


You can make cookies for special occasions and 
make them as a gift for friends and family.
Most of all, you can have fun making them! Get creative!
I had a lot of fun making my flower cookies.
I hope I can post more about cookies from now on.

Don't forget to subscribe new posting, everyone!
Thank you for visiting!


Friday, 2 September 2011

Light & Fluffy Pancake Recipe


Hello, everyone. 
Today I am posting about easy everyday pancake recipe.
The recipe is from Taste.com.au. I love 'taste' recipes because I can actually check all the reviews 
and adjust recipes by looking through comments.
I've tried meals and desserts and I pretty much love them all.

The pancake is very light, fluffy and very easy to make.
I used to buy a pancake mix but not any more.
Now, we have this perfect recipe for pancakes!

If you want more sweet base pancakes you can simply add more sugar in the recipe.

Buttermilk pancake recipe 
provided by Taste.com.au
I skipped berry syrup sauce from the original recipe

(serve 4 , about 8 medium size pancakes)

1/4 cup caster sugar
1/4 teaspoon of baking soda
1 cup self-raising flour, sifted
1 egg
1 1/4 cup buttermilk
olive oil cooking spray or butter for a frying pan
maple syrup
yoghurt to serve( optional)

If you don't have buttermilk, you can simply make it with 
-Just under a cup of milk
-a table spoon of white vinegar of lemon juice
Mix them together and let stand for five minutes. Ready to go!


1.Combine sugar, baking soda and flour in a bowl.
2. Whisk an egg and buttermilk and Stir into the flour mixture until smooth.
3. Heat a frying pan over medium heat. Spray cooking oil or put butter on the pan.
Pour 2~3 table spoons of the mixture. 
Cook for about 2 minutes or until bubbles form on surface. 
Turn. Cook a further 1 to 2 minutes or until cook through. Repeat with remaining mixture.
Serve with maple syrup & fresh fruits(optional)


I hope you enjoy delicious pancake breakfast with your family!
Have a great day!


Saturday, 27 August 2011

[Recipe] Raspberry muffins


Hi, everyone!!
I sometimes make muffins for a lunch box or my tea time dessert.
I found this delicious recipe from Recipe+ magazine 
and I changed some of them but I'll post the original one.
I love the Recipe+ magazine because they've got lots of budget recipes for family.
I was about to add white chocolate but I just omitted it to cut down too much sweetness.
My husband is a big fan of milk or white chocolate but not me.
(I am more for dark chocolate. Love love love it..)


This recipe is very simple and easy to make.
You don't need any electric mixer. Just with your hands and a good spatula.

You can make 6-8 muffins with the recipe
Original recipe' Crunch-topped berry muffins' by 'Recipe+' magazine

Ingredients

2 cups self-raising flour
3/4 cup caster sugar
75g unsalted butter, melted
3/4 cup buttermilk
1 egg, lightly beaten
1 cup fresh of frozen raspberries or mixed berries

If you don't have buttermilk, here is the resource for how to make buttermilk.

For crunch toppings(optional)

1/2 cup walnuts, finely chopped
1 1/2 table spoons brown sugar
1/2 teaspoon ground cinnamon

I mixed rolled oatmeal and walnuts together and made them as 1/2 cup.

1. Preheat oven to 200'C/180'C fan forced.
Line muffin holes with paper cases.


2. (for toppings) Mix all ingredients and set aside.


3. Sift sugar and flour together and mix well. 


4. Mix buttermilk, egg, melted butter together well and 
Stir it into above(dry ingredients) until just combined.


5. Fold in berries.


It's ready.^^


6. Spoon mixture into prepared holes.


7. Sprinkle with toppings(optional) and bake for 20-30 minutes or 
until a skewer inserted at centre comes out clean.
It took me 25 mins.


8. Transfer to a wire rack to cool. 
Finished!


So easy and simple, isn't it?
 You can buy it for $4.00/each from retail shops or cafes 
but you can make it with $1.20/each. 
How awesome!


I hope you enjoy baking the delicious muffins!!

Happy baking!


Wednesday, 24 August 2011

[Recipe] Macarons with milk chocolate ganache


Hello, everyone.
I'd love to share my first macarons attempt. 
I always wanted to try to make macarons but somehow.. I was a bit scared.
When I was looking for the recipe with good reviews, 
I found many people tried and failed.
What if I fail?? I didn't want to waste my ingredients. 
Especially almond meal...It is expensive compared to other ingredients,too.
There are lots of recipes you can follow on the internet.
I've watched you tube videos about how to make macarons.
All of them looked easy for me but I was wrong.
I think you need some know how and many practices..


You might think my macarons look okay. Yes, some of them..
but I made lemon curd filling macarons.. They came out a big disaster. 
That's why I'm only posting milk chocolate filling macarons. =D
I don't think it is a matter of the recipe but a matter of some skills.

Before you start, make sure your egg whites are room temperature.
You can separate egg whites when the eggs are cold ( easy to make them seperate.)
No very fresh eggs! Old eggs are better for holding air inside.
You can take them from fridge and let them sit overnight 
so you can ready to bake the next day!

Ingredients

  • 1 1/3 cup confectioners' sugar(icing sugar)
  • 1 cup almond flour
  • 3 large egg whites, room temperature
  • Pinch of cream of tartar
  • 1/4 cup superfine sugar( castor sugar)


you can make 20-30 macarons with this recipe.

1. Sieve find almond meal (almond flour) and icing sugar together and mix. Set aside.


2. Whisk egg whites with a mixer on medium speed until foamy. (Keep mixing..don't stop.)
Add cream of tartar ( if you don't have it, you can skip it.)
Add castor sugar gradually. Whisk on the high speed until stiff peak foams.


3. Fold dry mixture(icing sugar+ almond flour) into whites until the mixture is smooth.


4. Transfer batter to a piping bag with a round tip. Prepare 2* baking tray with lined baking sheets.
Pipe it onto baking sheets (above). Make sure macarons are 2 cm apart from each other.
Tap bottom of each sheet on the work surface to release air inside the macaron batter.
Let it stand at room temperature for about 15-20 minutes to foam a skin.
While skin is foaming, preheat oven 170'C

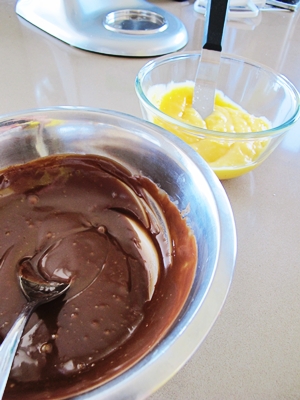
My milk chocolate ganache & lemon curd filling

5. Bake one sheet at a time. Bake for about 10 mins until macarons are crisp and firm.
 Rotate half way through.


6. Let it cool on the baking sheet for 2-3 mins and transfer to a wire rack.


7. Sandwich 2 macarons with 1 teaspoon of filling.


 8. Finished!! Sweet macarons with milk chocolate ganache.

Here is a Chocolate Ganache recipe by Mathastewart.
I didn't have dark chocolate so used milk chocolate(my husband's favourite) and it turned out great.

*You can use any jam you have for your macaron filling.


My picky husband loved my first macarons. A good complement by him is always rewarding. =D

*Piping a right amount of macarons seems to be important. Practice makes perfect!!

Hope you enjoy baking macarons!


Friday, 19 August 2011

[Recipe] Banana bread with coconut & walnut


This is the upgrade version of banana bread.
The original recipe is Banana Bread with Coconut and Pecans 
I only had walnuts so I used it instead of pecans.
I love the magnolia bakery cookbook. I've tried a few recipes and all turned out great.

mashed bananas
I had lady finger bananas
 (I know,, too expensive to buy but I was lucky to have a few thanks to my mother in law)
but it was a bit bitter so I waited for them to get ripe enough for baking.

very moist and soft 
It is perfect for kids' lunch box or for tea time break. 
I love the fact that the bread has lots of goodies like bananas, coconuts and walnuts.
You can make a large batch in one go, freeze it to eat for later as well.
I halved the recipe but I wish I could have made a whole batch because it was so good!
Here is the recipe for you.

Ingredients

3 cups flour
1 1/2 teaspoons baking soda
3/4 teaspoon cinnamon
3/4 teaspoon salt
3/4 cup canola oil
1 1/2 cups sugar
3 large eggs, at room temperature, well beaten
1 1/2 teaspoons vanilla extract
1 1/2 cups mashed ripe bananas
3/4 cup sour cream
1 1/2 cups coarsely chopped toasted pecans( I used walnuts)
3/4 shredded coconut


1. Preheat oven to 350 degrees.
2. Grease and lightly flour a 10 inch tube pan.
3. In a medium size bowl, sift together the flour, baking soda, cinnamon and salt. Set aside.


4. Beat the oil and sugar together.
5. Add the eggs and vanilla, and beat well.


 6. Add the bananas and sour cream and mix well.


7. Add the dry ingredients and mix until just combined.


8. Stir in the pecans(or walnuts) and coconut. 


9. Pour the batter into the prepared pan. 
Bake for 60-70 minutes, 
or until a cake tester inserted into the centre of the bread comes out with moist crumb attached.


10. Let it cool.

cooling down... Smells great!
 Like I said, I halved the original recipe so my baking time was about 30~40 minutes at 180'C.
The smell was wonderful.. It'll make you so hungry for sure.


  I recommend you to keep this recipe for your family.
When banana price goes down, we can bake as much as we can!
Or if you love this so much, you can try now. ^^

Happy baking, everyone!


Sunday, 14 August 2011

How to make Mochi


Hi. I am posting about Mochi today.
 I made traditional mochi for my parents in-law.
Very soft and easy to make.
This is the basic mochi anybody can make.
It is a home-made style mochi so if you want to give it a go, 
Here is the easiest recipe for you.


I like the freshest mochi!!! As soon as I made it, I tried it. Omg!! so good!!!
I love the red bean paste even though I didn't make it from the scratch.
You can find black sesame paste in Asian grocery shops as well.
You can make about 6 mochi with this recipe.
I recommend you eat them in a day.
You can have the softest mochi !!


Ingredients
150g glutinous rice flour
 3 table spoons of sugar
 pinch of salt
150g warm water
Potato starch for dusting
Red bean paste 
(I bought a pack of red bean paste from Asian grocery shop)


1. Mix flour, sugar, salt and water and stir till smooth
2. Microwave it 3mins and mix it through. 
     Microwave 30 second to a min again.
3. Dust potato starch on the bench and knead the mixture( be careful, hot!)
4. Take one mochi size(up to you!) from the mixture 
and put a teaspoonful of red bean pasted inside of mochi
5. Make a round ball shape and dust with potato starch.


Why don't you make some mochi for your family and friends today?

Enjoy, everyone~