MyCupKates

Saturday, 27 August 2011

[Recipe] Raspberry muffins


Hi, everyone!!
I sometimes make muffins for a lunch box or my tea time dessert.
I found this delicious recipe from Recipe+ magazine 
and I changed some of them but I'll post the original one.
I love the Recipe+ magazine because they've got lots of budget recipes for family.
I was about to add white chocolate but I just omitted it to cut down too much sweetness.
My husband is a big fan of milk or white chocolate but not me.
(I am more for dark chocolate. Love love love it..)


This recipe is very simple and easy to make.
You don't need any electric mixer. Just with your hands and a good spatula.

You can make 6-8 muffins with the recipe
Original recipe' Crunch-topped berry muffins' by 'Recipe+' magazine

Ingredients

2 cups self-raising flour
3/4 cup caster sugar
75g unsalted butter, melted
3/4 cup buttermilk
1 egg, lightly beaten
1 cup fresh of frozen raspberries or mixed berries

If you don't have buttermilk, here is the resource for how to make buttermilk.

For crunch toppings(optional)

1/2 cup walnuts, finely chopped
1 1/2 table spoons brown sugar
1/2 teaspoon ground cinnamon

I mixed rolled oatmeal and walnuts together and made them as 1/2 cup.

1. Preheat oven to 200'C/180'C fan forced.
Line muffin holes with paper cases.


2. (for toppings) Mix all ingredients and set aside.


3. Sift sugar and flour together and mix well. 


4. Mix buttermilk, egg, melted butter together well and 
Stir it into above(dry ingredients) until just combined.


5. Fold in berries.


It's ready.^^


6. Spoon mixture into prepared holes.


7. Sprinkle with toppings(optional) and bake for 20-30 minutes or 
until a skewer inserted at centre comes out clean.
It took me 25 mins.


8. Transfer to a wire rack to cool. 
Finished!


So easy and simple, isn't it?
 You can buy it for $4.00/each from retail shops or cafes 
but you can make it with $1.20/each. 
How awesome!


I hope you enjoy baking the delicious muffins!!

Happy baking!


Wednesday, 24 August 2011

[Recipe] Macarons with milk chocolate ganache


Hello, everyone.
I'd love to share my first macarons attempt. 
I always wanted to try to make macarons but somehow.. I was a bit scared.
When I was looking for the recipe with good reviews, 
I found many people tried and failed.
What if I fail?? I didn't want to waste my ingredients. 
Especially almond meal...It is expensive compared to other ingredients,too.
There are lots of recipes you can follow on the internet.
I've watched you tube videos about how to make macarons.
All of them looked easy for me but I was wrong.
I think you need some know how and many practices..


You might think my macarons look okay. Yes, some of them..
but I made lemon curd filling macarons.. They came out a big disaster. 
That's why I'm only posting milk chocolate filling macarons. =D
I don't think it is a matter of the recipe but a matter of some skills.

Before you start, make sure your egg whites are room temperature.
You can separate egg whites when the eggs are cold ( easy to make them seperate.)
No very fresh eggs! Old eggs are better for holding air inside.
You can take them from fridge and let them sit overnight 
so you can ready to bake the next day!

Ingredients

  • 1 1/3 cup confectioners' sugar(icing sugar)
  • 1 cup almond flour
  • 3 large egg whites, room temperature
  • Pinch of cream of tartar
  • 1/4 cup superfine sugar( castor sugar)


you can make 20-30 macarons with this recipe.

1. Sieve find almond meal (almond flour) and icing sugar together and mix. Set aside.


2. Whisk egg whites with a mixer on medium speed until foamy. (Keep mixing..don't stop.)
Add cream of tartar ( if you don't have it, you can skip it.)
Add castor sugar gradually. Whisk on the high speed until stiff peak foams.


3. Fold dry mixture(icing sugar+ almond flour) into whites until the mixture is smooth.


4. Transfer batter to a piping bag with a round tip. Prepare 2* baking tray with lined baking sheets.
Pipe it onto baking sheets (above). Make sure macarons are 2 cm apart from each other.
Tap bottom of each sheet on the work surface to release air inside the macaron batter.
Let it stand at room temperature for about 15-20 minutes to foam a skin.
While skin is foaming, preheat oven 170'C

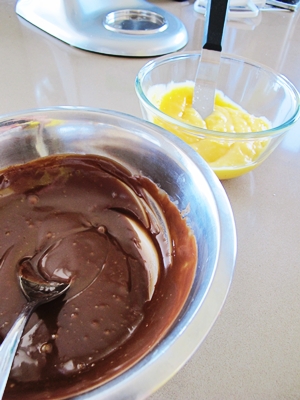
My milk chocolate ganache & lemon curd filling

5. Bake one sheet at a time. Bake for about 10 mins until macarons are crisp and firm.
 Rotate half way through.


6. Let it cool on the baking sheet for 2-3 mins and transfer to a wire rack.


7. Sandwich 2 macarons with 1 teaspoon of filling.


 8. Finished!! Sweet macarons with milk chocolate ganache.

Here is a Chocolate Ganache recipe by Mathastewart.
I didn't have dark chocolate so used milk chocolate(my husband's favourite) and it turned out great.

*You can use any jam you have for your macaron filling.


My picky husband loved my first macarons. A good complement by him is always rewarding. =D

*Piping a right amount of macarons seems to be important. Practice makes perfect!!

Hope you enjoy baking macarons!


Tuesday, 23 August 2011

The Giant Sugar Flower Class by Planet Cake

Finished products!
Hello, everyone.
 I've just completed the giant sugar flower class!!!! 
(I posted about the planet cake & sugar flowers before.)
 I was so excited when I enrolled the class 
because it was the first time for me to learn sugar craft professionally.
I've always learned it from internet, books and videos..almost self learning I guess.
My teacher, Jessica has been so amazing.
She doesn't hesitate to share her know-how & knowledge with students.
Most of all, she is a very kind and happy person.
Loved listening to her I-pod music during the class.

Poppy

Dog rose(yellow)

Magnolia
 I had some drama going on during the class.  When I was taping all my magnolia petals, I dropped it...and most petals were just broken apart.. It broke my heart... literally.. 
I've been putting so much effort into making petals for last 3 weeks and I just ruined it in seconds.
I was very lucky to have other classmates' extra petals so
 I was able to make my new magnolia...How lucky I am!
Thank you, class & Jessica for helping me..

Air brushing

Dusting

I love this dessert and tea table. 

very proud of what we've done!!

 It was great to see all flowers completed and looked beautiful.
We did our own design so every flower looked unique and intriguing..
Some were gorgeous and looked real. Others were experimental.. rare colour to find but very attractive..
I've learned a lot from other people's flower design,too.

My seat was right next to teacher's demo table. I can see my teacher, Jessica with brown T-shirt.

I will miss this class.
Hope I can come back soon... First, I should save some money.=D hahaha
We all finished the giant sugar flowers class!! Happy days! 
 Thank you for coming.
Have a great day!!!


Friday, 19 August 2011

[Recipe] Banana bread with coconut & walnut


This is the upgrade version of banana bread.
The original recipe is Banana Bread with Coconut and Pecans 
I only had walnuts so I used it instead of pecans.
I love the magnolia bakery cookbook. I've tried a few recipes and all turned out great.

mashed bananas
I had lady finger bananas
 (I know,, too expensive to buy but I was lucky to have a few thanks to my mother in law)
but it was a bit bitter so I waited for them to get ripe enough for baking.

very moist and soft 
It is perfect for kids' lunch box or for tea time break. 
I love the fact that the bread has lots of goodies like bananas, coconuts and walnuts.
You can make a large batch in one go, freeze it to eat for later as well.
I halved the recipe but I wish I could have made a whole batch because it was so good!
Here is the recipe for you.

Ingredients

3 cups flour
1 1/2 teaspoons baking soda
3/4 teaspoon cinnamon
3/4 teaspoon salt
3/4 cup canola oil
1 1/2 cups sugar
3 large eggs, at room temperature, well beaten
1 1/2 teaspoons vanilla extract
1 1/2 cups mashed ripe bananas
3/4 cup sour cream
1 1/2 cups coarsely chopped toasted pecans( I used walnuts)
3/4 shredded coconut


1. Preheat oven to 350 degrees.
2. Grease and lightly flour a 10 inch tube pan.
3. In a medium size bowl, sift together the flour, baking soda, cinnamon and salt. Set aside.


4. Beat the oil and sugar together.
5. Add the eggs and vanilla, and beat well.


 6. Add the bananas and sour cream and mix well.


7. Add the dry ingredients and mix until just combined.


8. Stir in the pecans(or walnuts) and coconut. 


9. Pour the batter into the prepared pan. 
Bake for 60-70 minutes, 
or until a cake tester inserted into the centre of the bread comes out with moist crumb attached.


10. Let it cool.

cooling down... Smells great!
 Like I said, I halved the original recipe so my baking time was about 30~40 minutes at 180'C.
The smell was wonderful.. It'll make you so hungry for sure.


  I recommend you to keep this recipe for your family.
When banana price goes down, we can bake as much as we can!
Or if you love this so much, you can try now. ^^

Happy baking, everyone!


Wednesday, 17 August 2011

Sugar flowers 'Poppy'

Find my sky blue poppy flower..

I adore sugar flowers.. Especially on wedding cakes, 
beautiful hand made flowers give cakes extra wow facts.
I've been learning about making giant sugar flowers at Planet cake.
I've been making peony, magnolia, dog rose and poppy.
I've got one more class to go. ( I haven't completed any flowers yet 
because we've been making flowers step by step..)

my sky blue poppy
I've repeated what I've learned at home every week.
I am supposed to learn combining all elements together next week..
However, I couldn't help myself wanting to see my finished products...at least one.
I decided to complete the poppy..
All elements I made at home were smaller than ones from the class.
I can say.. medium size..
I must say, it is a time-consuming work and 
each elements need to be dried enough.( overnight - 2.3days..)


all different centres of flowers

I used left over sugar paste from the class.. 
it is supposed to be white(for colouring) but I had lots of sky blue paste so had to use it.^^


flower petals

I've used cutters or made samples for petals.
There are some wiring work and 
rolling each petals to make them thin & natural as well.


This is my medium version of poppy. 
I'll post more of my giant sugar flowers soon.
Keep updated, everyone!